You can start a Percentage Off sale on a group of items based on like criteria. (vendor, category, invoice, etc).
Once you have entered your criteria you will be able to select items from the filtered list to apply the sale to, if not all items should apply for the sale.
- First go to Administrative > System Options > Pricing Options - Enable Auto-Pricing, make sure this to set to TRUE.
- Then close/reopen The Edge.
Sign Format is required to Start a Sale, but you do not need to print the signage.
If you don't have one created, see below for the full instructions on creating a Sign Format to then Start a Sale.
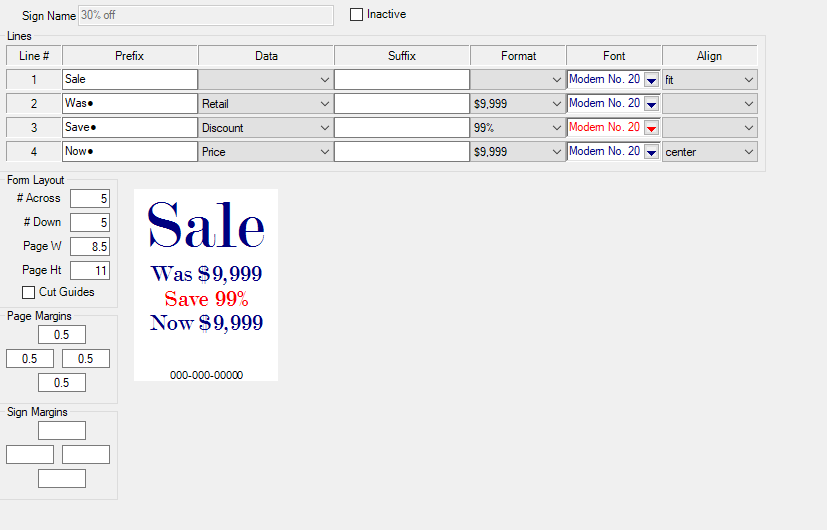
Select Administrative > Sign Formats. The Sales Sign Definitions screen containing a list of previously designed formats will appear.
Here you can customize how you would like the signs to show, see example below:

Once the sign is created you can then Start a Sale:
- Select Administrative > Start a Sale.
The fields on the Start a Sale window are below:
Item Filter
|
Presents a standard item filter to aid in narrowing down results. You can use the DATES tab on the item filter to sort by items added before/after a certain date.
|
Discount
|
The percentage discount to apply.
|
Sign Type
|
The type of sign to generate for items put on sale.
|
Sale Starts/Ends
|
The dates this sale will run (optional).
|
Skip Items Already on Sale
|
If running multiple sales, items already on sale will not be affected by this new sale.
|
New Tags
|
Defines whether to generate new inventory tags for items put on sale.
|
- Complete the fields as desired and click OK. The results window appear.
- Select items to include on the sale and click OK.