Entering a sale consists of 6 steps:
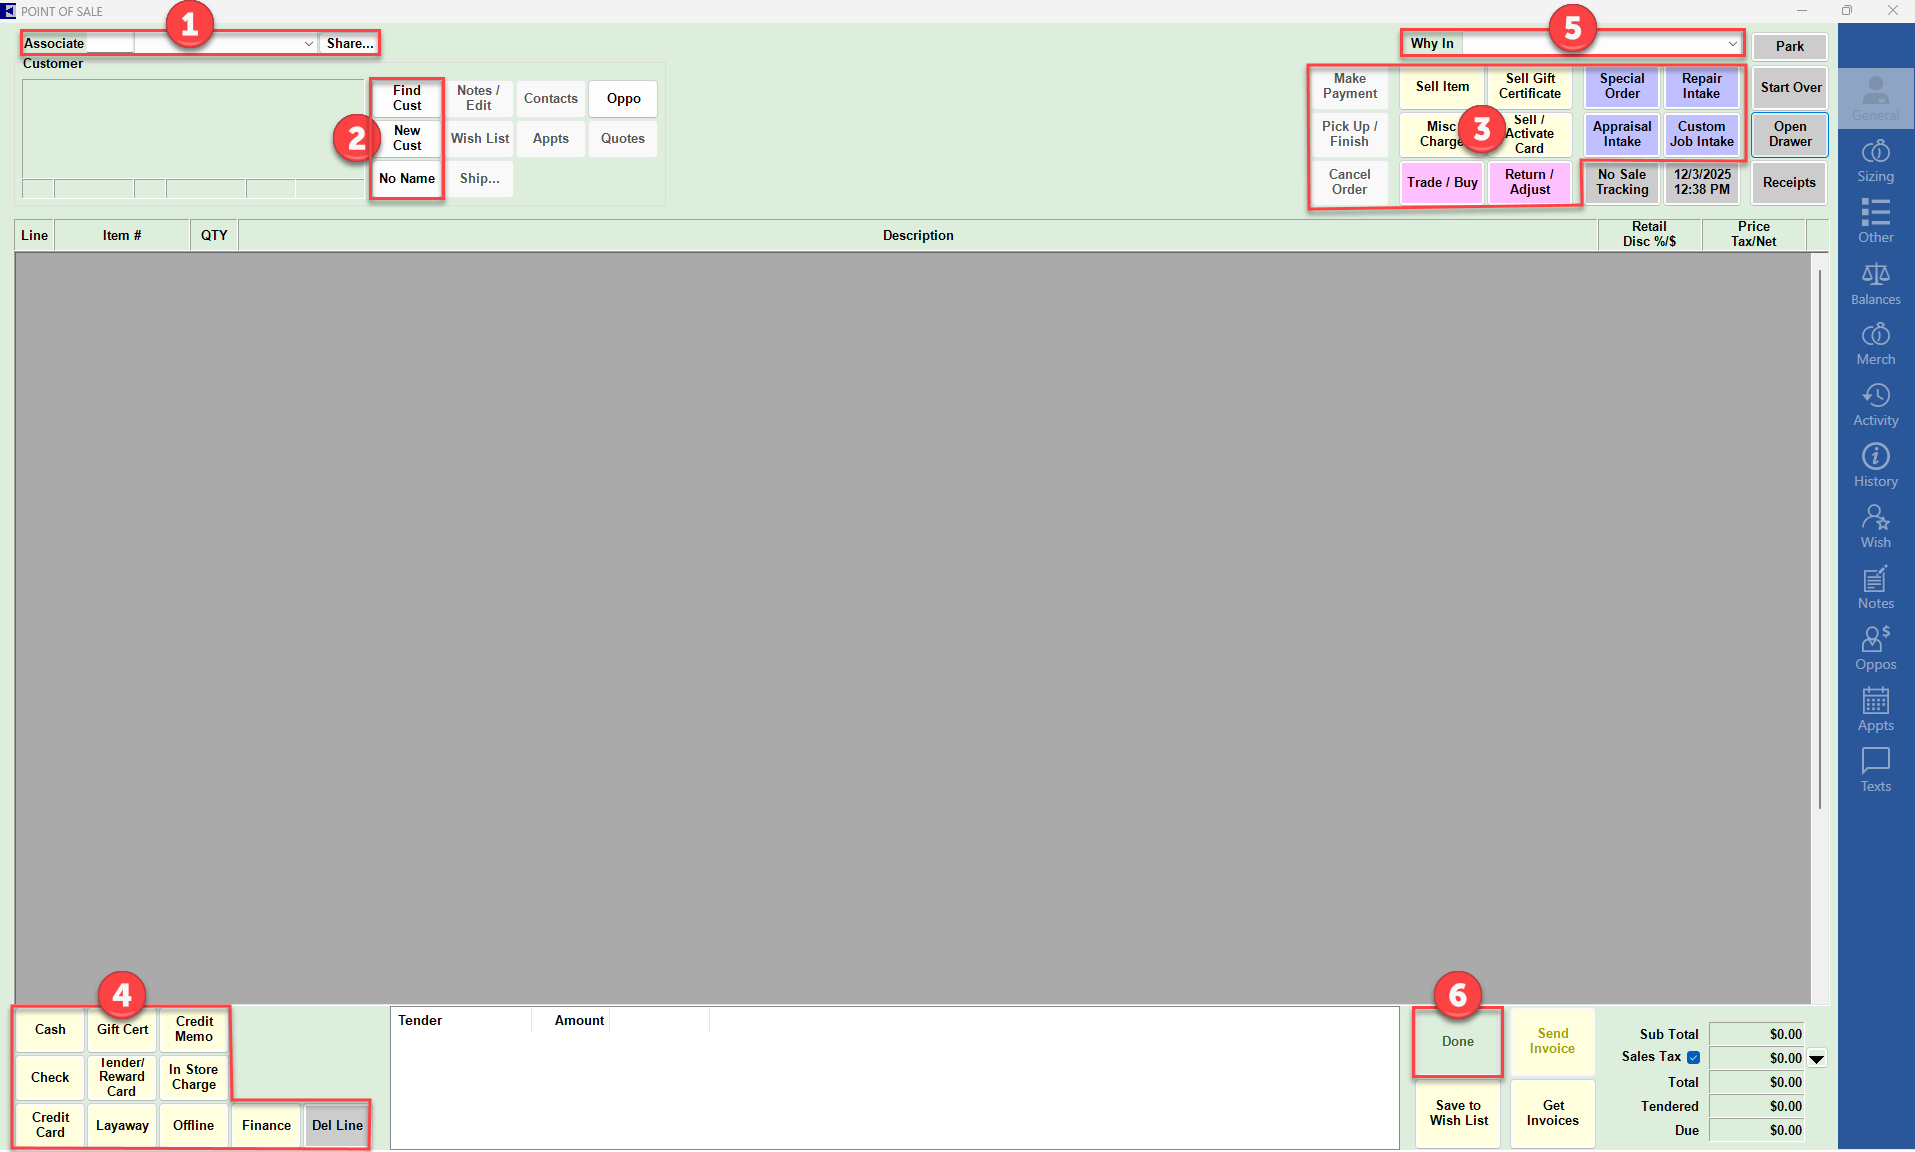
- Identify the associate(s).
- Select the customer.
- Add transaction details.
- Enter payment method(s).
- [optional] Specify why the customer is in the store today (Why In).
- Click Done to finalize sale and generate the receipt.
Step 1 - Identify the Associate
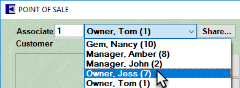
- Enter the associate number or use the drop-down to select them from the list.
- If you need to split between multiple associates use the Share button to specify additional associates as well as their split percentage.
NOTE: For layaways, repairs, and special orders, the transaction is always assigned to the associate that processed the original intake regardless of who processes subsequent payments or pickups.
Step 2 - Select the Customer
- Use the Find Cust button to search for customers.
- Use the New Cust button to add a new customer.
- Use the No Name button if customer does not wish to give any information.
- See Selecting the Customer for more detailed information.
NOTE: To avoid duplication, it is recommended you always search before adding a new customer. There is a System Option that can be enabled that enforces this by disabling the New Cust button at POS.
Step 3 - Add Transaction Details
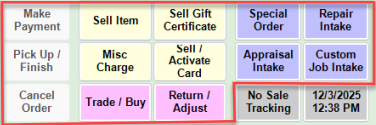
- Each transaction detail that you add will create one new sale line that will display in the main window.
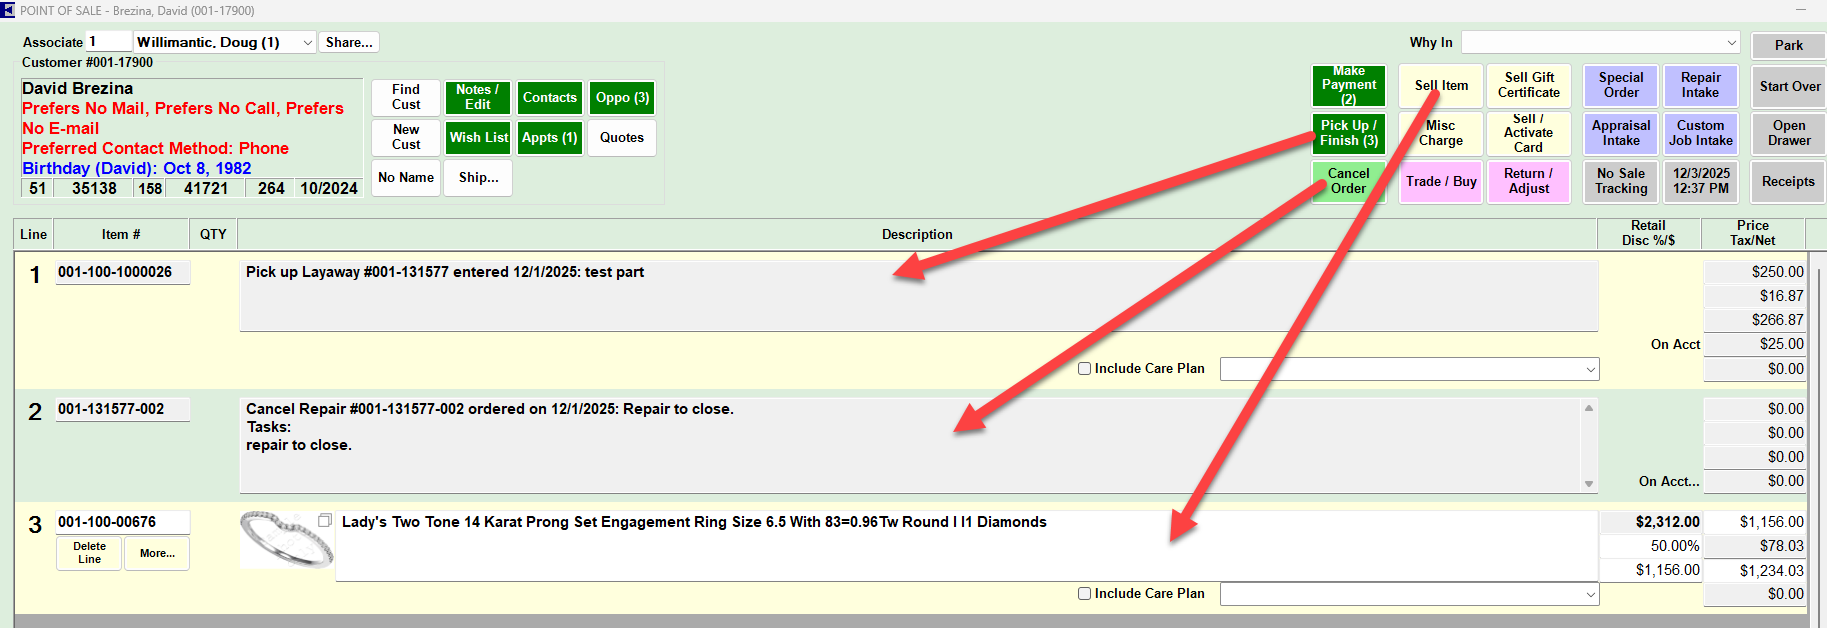
In this example, we are picking up a layaway, canceling a repair, and selling an item.
- Transaction types can be mixed on the same sale and there are no limits to the number of sale lines.
- Every sale line includes a Delete Line button that will remove it in the event of mistake or error.
- The Make Payment, Pick Up/Finish, and Cancel Order buttons are only available if there are active transactions. A System Option controls whether these buttons also indicate the number of applicable transactions.
NOTE: Many transactions can be initiated by scanning the item or job envelope's barcode. This can be scanned into a blank POS screen and will automatically bring up both the customer and transaction detail.
Step 4 - Enter Payment Methods

- Each entered payment method will display in the center tender panel showing the type and amount.
- The sale totals display in the bottom right. All money needs to be accounted for and Due needs to equal $0 before the sale can be completed.
- Positive numbers are tender collected by the store, while negative numbers are refunded to the customer.
- To remove an incorrect payment select it and use the Del Line button.
- See Payment Methods for more detail on each method.
Step 5 - Specify Why In
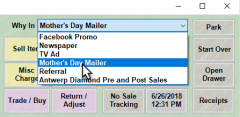
- Choose why the customer is in the store today. While optional, we strongly encourage you to take advantage of this valuable marketing data.
- System Options control whether this is required and the requirement can be conditional (i.e. why in can be optional for sales that are payments, cancellations, returns, etc).
- See Why In for more information.
Step 6 - Finish Sale
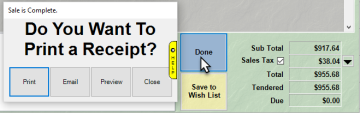
- Click the Done button to finish the sale. This button will only be clickable when all money has been accounted for and Due shows $0.
- The System Option labeled "Ask Before Printing Receipt" controls whether the receipt prints immediately or if the Sale is Complete window appears with additional options to print, email, or preview. Another System Option labeled "Ask to Print Gift Receipt" controls whether you get the option to print a Gift Receipt.
- If this sale includes a transaction with a job envelope (e.g. repair intake) then the envelope will print along with the receipt.
- See Receipt Preview for information on working with that screen.
- See Receipt Review for a breakdown of a sales receipt.
- See Envelope Review for a breakdown of a job envelope.