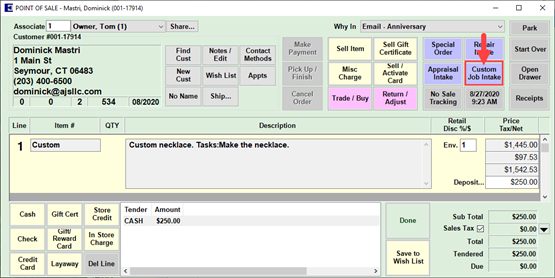
To create a Custom Job Item:
- Complete the Custom Job Intake at POS.
- Complete the job and mark it Done. There are 4 ways to do this from the main Edge menu:
i. Click Services > Done and enter/scan the job envelope or all the individual tasks.
ii. Click Services > Find > Job, enter criteria to find the job, and fill in the Done date.
iii. Click Services > Find > Job, enter criteria to find the job, and mark all tasks completed.
iv. Click Services > Move Envelope and move the job to a location that has the ‘Moving a Job to this location marks it as done’ box checked.
- The Create Custom Item window will automatically appear.
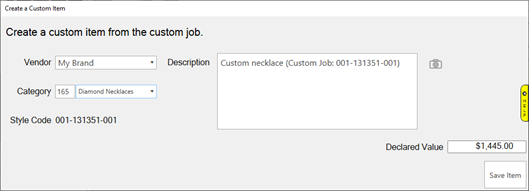
- Select the Vendor and Category for the item. Optionally, update the Description, Image, and Declared Value.
- Click Save Item.
NOTE: The default Declared Value will be the sum of all tasks on the job. Changing it on the item record will not change any values on the original job. The value from the item record is used for Care Plan, Insurance, Appraisal, and Repair purposes.