The Receive Invoice feature allows you to enter a number of items into inventory at once based on the invoice that accompanies the shipment. Though it is designed to function with purchase orders, it can be used by itself. For working with receipt of special orders, matching the incoming item with the order is automatic.
To receive items from invoice:
- Select Inventory > Items > Add > From Invoice (or P/O > Rcv Invoice). The Select a Vendor window will appear.
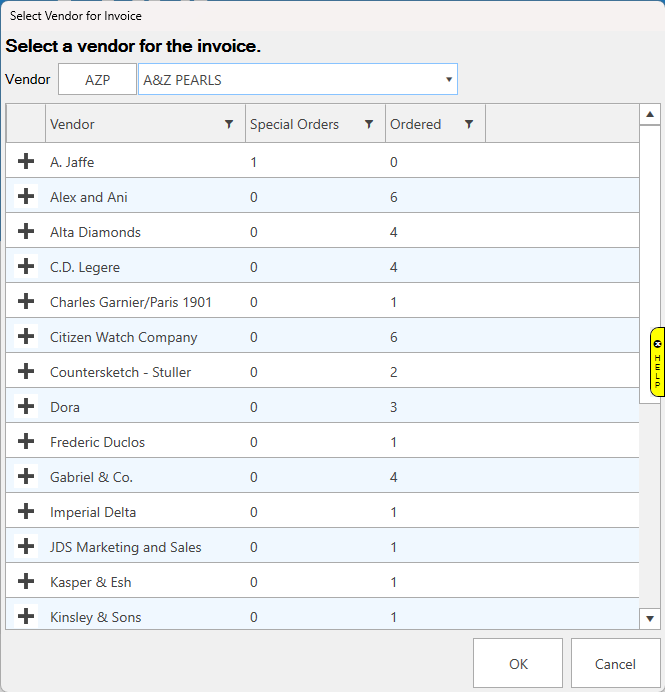
Fields and options in the Select a Vendor window include:
|
Vendor drop-down menu
|
Used to select a specific vendor from the full vendor list
|
|
Special Orders
|
Special orders not ordered on a purchase order
|
|
Ordered
|
Items on existing purchase order with ordered status
|
- Enter the vendor ID or select it from the drop-down menu and click OK. The Items Ordered window will appear.
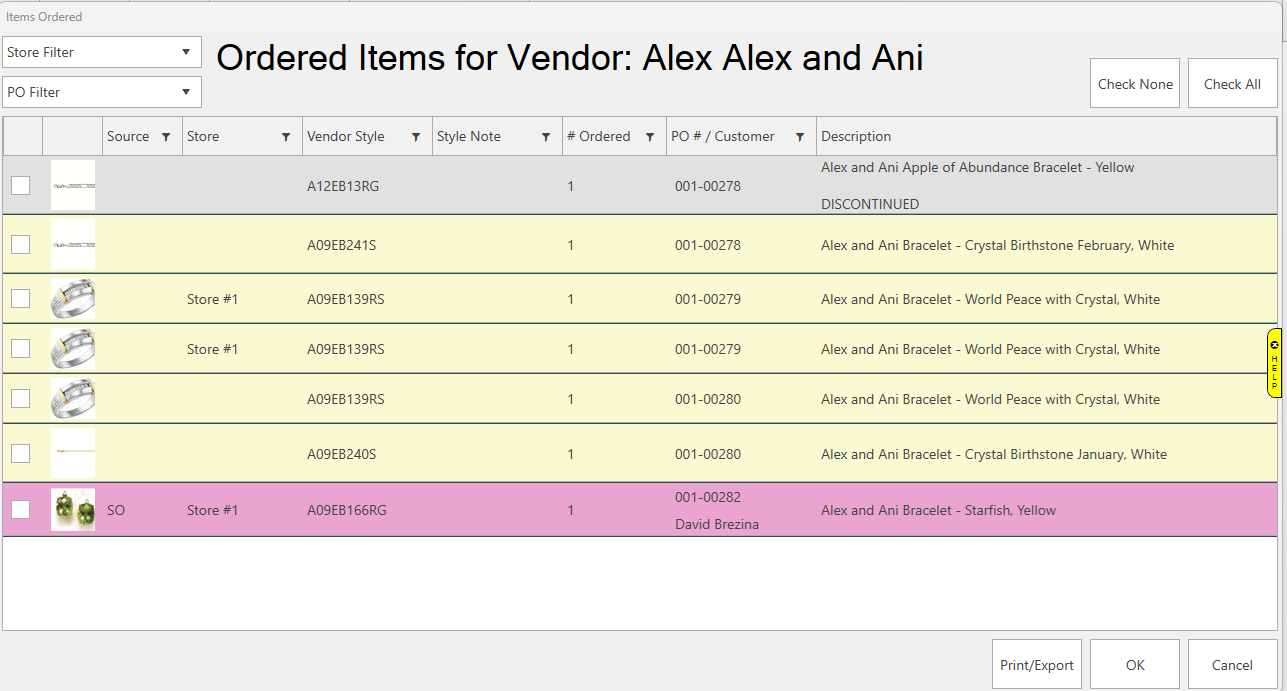
The Ordered Items window contains a list of items ordered from this vendor. They may or may not be included in the shipment you are receiving. Information shown on the Items Ordered window include:
|
Source
|
The initial source of the ordered item:
Q: Queued from the item record or Rapid Reorder
SO: Generated by a special order at POS (highlighted in purple).
|
|
Vendor Style
|
The vendor style number for verification.
|
|
Style Note
|
Text added to the style number that will help identify the item. For example, it might be stone type, size, etc.
|
|
# Ordered
|
The quantity ordered.
|
|
PO #/Customer
|
The purchase order number associated with the ordered item. If it is a special order, the customer name will appear.
|
|
Description
|
A description of the item.
|
|
Check/Uncheck All
|
Allows you to quickly check or uncheck all the items in the list.
|
|
|
|
For the purposes of the Retrieve Queued window and the Purchase Order window, line items will be color-coded as follows:

- Check the items that are included in this shipment. This should only be done for one invoice at a time.
- Select OK. The Receive Invoice window will appear populated with the selected items.
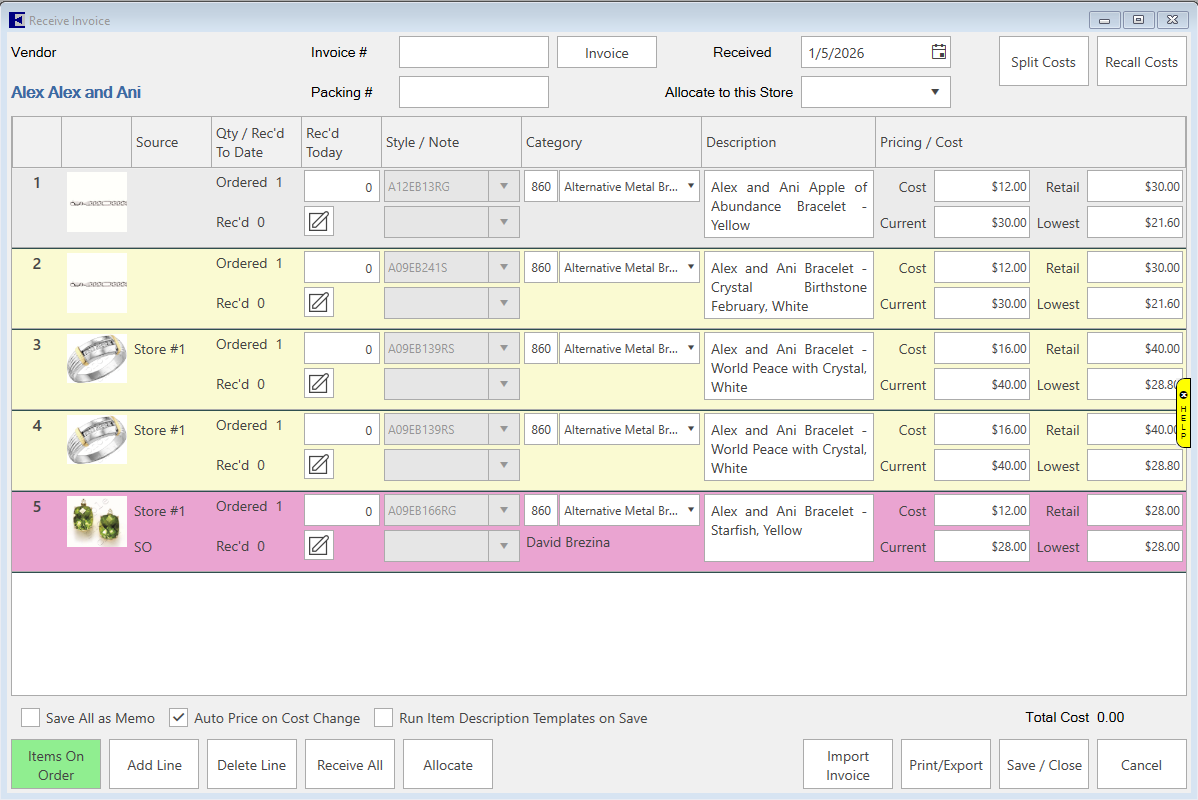
Fields and options in the Receive Invoice window include:
|
Invoice #
|
The number of the vendor's invoice that contains the item. This is required.
|
|
Packing #
|
The packing # on this invoice.
|
|
Received
|
The date you are entering the items. By default, The Edge populates this field with the current date. It will go into the item record as the Date Entered value.
|
|
Allocate Items to Store x
|
Allows you to quickly allocate items to store the current store; if you use this, the Allocate window will not open for this item when you save the Receive Invoice window.
|
|
Save All as Memo
|
Allows you to quickly mark these items as memo items. For more information about memo items, see the section entitled Consignment and Memo Items. This will not work for bulk or special order items.
|
|
Auto Price on Cost Change
|
Allows you to quickly mark these items as memo items. For more information about memo items, see the section entitled Consignment and Memo ItemsWhile checked, auto-pricing is enabled. (This includes when importing invoice from file.)
|
|
Recall Costs
|
Obtains costs for the ordered item lines for all items. If you have the system option set to use the most recent cost, it will load the most recent cost for that style code from the database.
|
|
Split Costs
|
Click split costs to add an additional cost to the invoice and split it proportionally across all items.
|
|
Items on Order
|
Returns the Items Ordered window so you can select additional items.
|
|
Add Line
|
Allows you to manually add an item line to the invoice, from the style number records, or completely new. If the item is associated with a special order, it will be highlighted in purple.
|
|
Delete Line
|
If the item has been ordered, this deletes a line from the Receive Invoice list and the item is not received. It does not affect the purchase order, only the receive list. Next time you are receiving from the vendor, it will still appear. The item will be unchecked in the Items Ordered list.
|
|
View Item Details
|
Opens the item record for the selected item. Changes made will be reflected here.
|
|
Receive All
|
Automatically receives all items in the Receive Invoice list. It fills in the ordered quantities and dates them the current day.
|
|
Allocate
|
Allows you to allocate items for the currently selected line. If it is a special order, be sure to allocate to the correct customer.
|
|
Import Invoice
|
Click this button to import items from a pre-made file.
|
- In the Invoice # field, enter the invoice number to be applied to all items received on this shipment. If you don't have an invoice # yet, you can enter the packing #.
- To add new or existing styles to be received on this shipment that didn't appear in the Items Ordered window, select Add Line. This is useful for shipments that did not have purchase orders associated with them. Alternatively, for items with a vendor barcode that has been in stock before, you can scan the tag and a line item will be populated for you. When you enter the style number, for items used before, The Edge will prompt you to copy the details for the existing record. If only one previous record exists, The Edge will automatically copy the details from that prior item.
NOTE: For special orders, items are highlighted. You must select the correct record to copy from for each customer.
- For each line item, verify and correct the data:
a. Source: What initiated the order: Q is for Queue, SO is for Special Order.
b. Qty Received to Date: The quantity of this item so far on this purchase order.
c. Qty Received Today: The quantity of this item received in this shipment.
d. Vendor Style/Note: The vendor style number or note.
e. Category: The Edge category for the item.
f. Description: The Edge description of the item.
g. Cost: The cost of the item.
h. Retail: The retail price of the item.
i. Lowest: The lowest the item can be sold at; this is kept in the item record.
j. Current: The current price of the item; this is kept in the item record.
- Edit or add item lines as needed. If you wish to undo changes to cost, use the Recall Cost button.
- Specify quantity received for each style in the Rec’d Today field.
- Press Enter. The Allocate window will appear.

- Allocate items as described in the section entitled Allocating Items.
NOTE: Special order items will indicate the customer for whom the items was ordered and use that line to allocate the item to him or her.
- Select OK. The line item in the Receive Invoice window will indicate that item has been allocated.

- Select OK/Save & Close to receive this shipment and add these items to inventory. You will have an opportunity to edit item details.
- Repeat the entire process for each invoice. If a purchase order is associated with the order, its record will be updated to indicate that items were received.