The move item feature requires set up of locations. For more information, see the section entitled Locations. Once locations are established, The Edge can allow you to relocate inventory within the store from one location to another.
To do so:
- Navigate to Inventory > Items > Move. The Move Items window will appear.
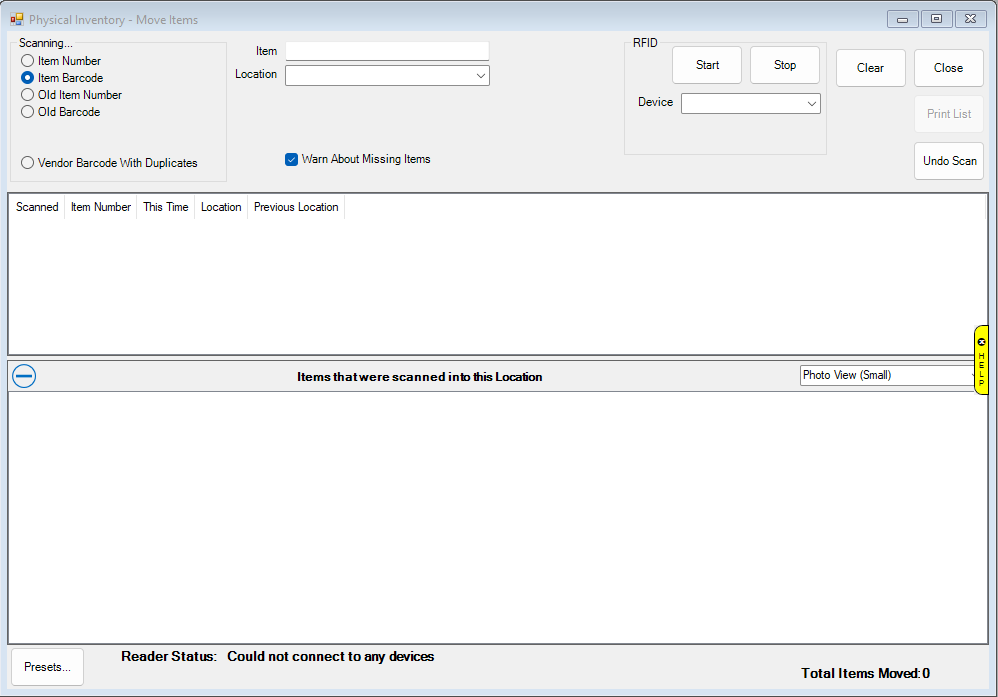
The Move Items window is divided into three sections:
• The top part is for setting inventory input type, entering item numbers, and managing other settings.
• The first window provides a list view of inventory as it is scanned or entered.
• The second window provides a picture view of items scanned and added to the results.
Specific fields and options in the Move Items window include:
|
Scanning
|
Indicates input methods:
|
|
|
Item Number
|
By input to the keyboard in the form of the item number that appears on the tag.
|
|
|
Item Barcode
|
By barcode scan.
|
|
|
Old Item Number
|
By keyboard entry; a stock number produced by another system.
|
|
|
Old Barcode
|
By scan of a barcode from a previous system.
|
|
|
Vendor Barcode With Duplicates
|
This box allows you to scan vendor barcodes and will accept duplicates.
|
|
Item
|
The value scanned or to allow for manual entry.
|
|
Location
|
Allows you to select a specific location within the store to which items should be moved. For more about working with locations, see the section entitled Locations.
|
|
Clear
|
Clears the window. This does not clear the move activity, it just refreshes the window.
|
|
Close
|
Items are saved as you scan. This closes the Move Item window.
|
|
Print List
|
Prints a hard copy list of the inventory. You will be prompted to indicate which portion of the window to print.
|
- Select the method of scanning, i.e., the field to be captured with the barcode scan, to be used from the options described above.
- From the Location drop-down menu, select the location of the item in the store, such as CASE1 or WALL1. Depending on settings in System Options, this may be required.
- If you have opted to manually enter item numbers by keyboard, you should type them into the Item field. If you are scanning items, note that the barcode will appear in the Item field.
- Enter the item to be moved.
- The item listing will appear in the middle portion of the Move Items window and an image, if available, will appear in the lower portion.
- When moving is complete, select Close. The item record will reflect that location.
NOTE: To recategorize items, use Supervisor > Move to new category.