To verify items for the test sale in POS:
NOTE: For steps on entering an associate and locating a customer, please revisit the previous article entitled POS (Point of Sale): Verify Customers.
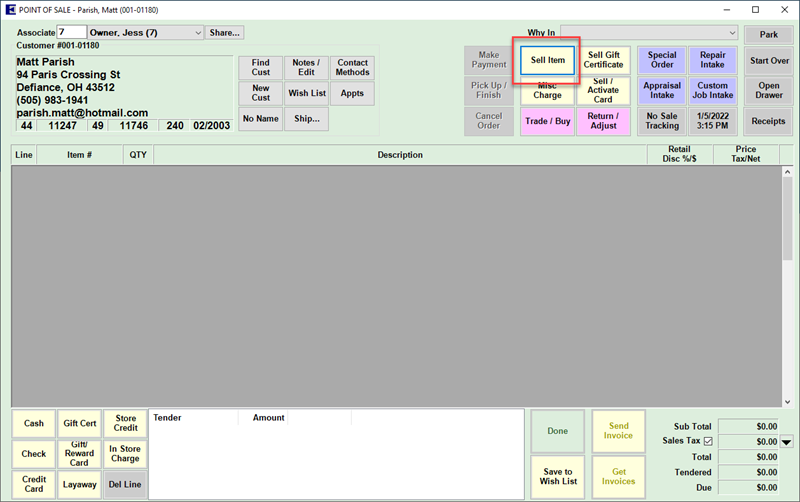
- Continuing from POS, select Sell Item.
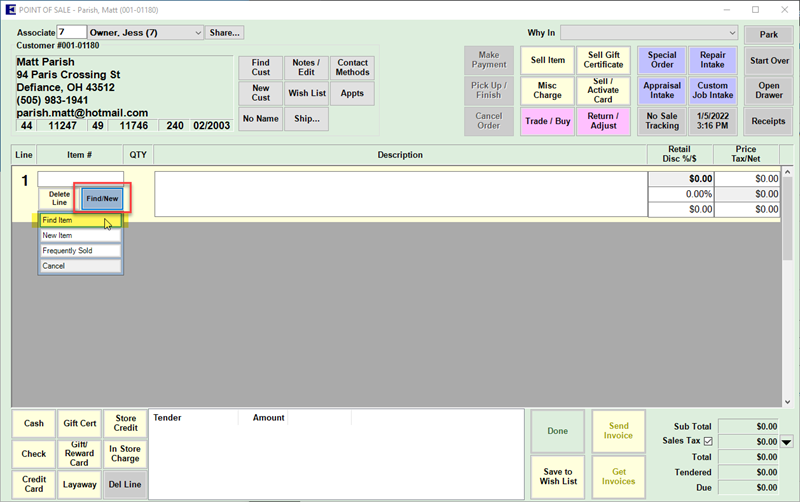
- From the resulting sale line, use the Find Item option.
- Search for one of the same items used when verifying your Fine Item Records using the hold stock number (or .OLD STOCK #). If you are using your old item numbers, prepend the item number with a “.”. This instructs The Edge to look at old item numbers only.
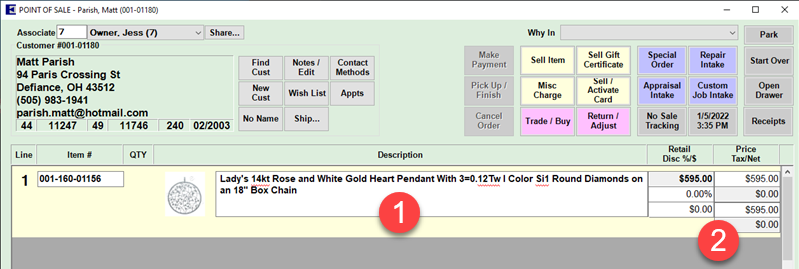
- Once you have located your item, click OK. Your item will now appear on the sale line.
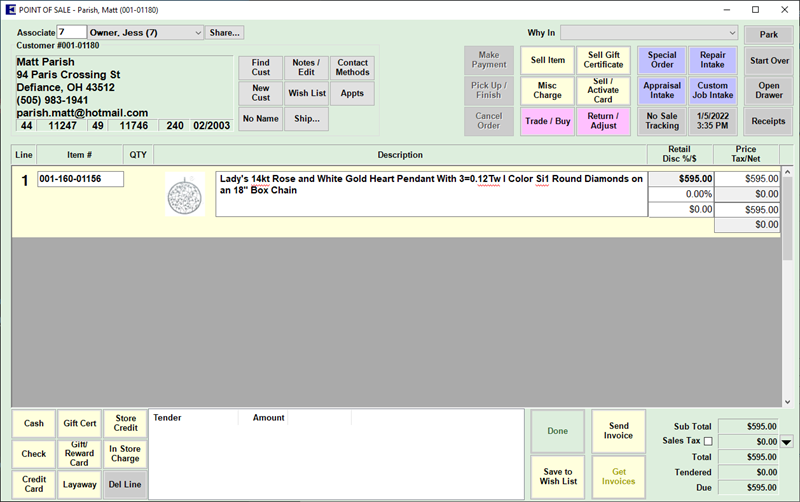
- Verify the description and selling price of each item.
Continue through the checklist by visiting the next article, POS: Verify Receipt Information.